Submit Action to Save Contacts in List Manager with Fields Mapping Part 1 Create SPEAK Editor
Originally published on Perficient Blogs Archive
This article is the second post in the series on creating a submit action to save contacts into the list manager in Sitecore. In the previous post, we saw a basic implementation without the ability to map form fields with the custom-created submit action. It only offered the option of configuring the Contact List via the Item Tree View field.
Here are the parts of the series related to the Submit Action to Save Contacts in List Manager:
-
Submit Action to Save Contacts in List Manager – Basic Implementation
-
Submit Action to Save Contacts in List Manager with Fields Mapping Part 1: Create SPEAK Editor
-
Submit Action to Save Contacts in List Manager with Fields Mapping Part 2: Create Submit Action
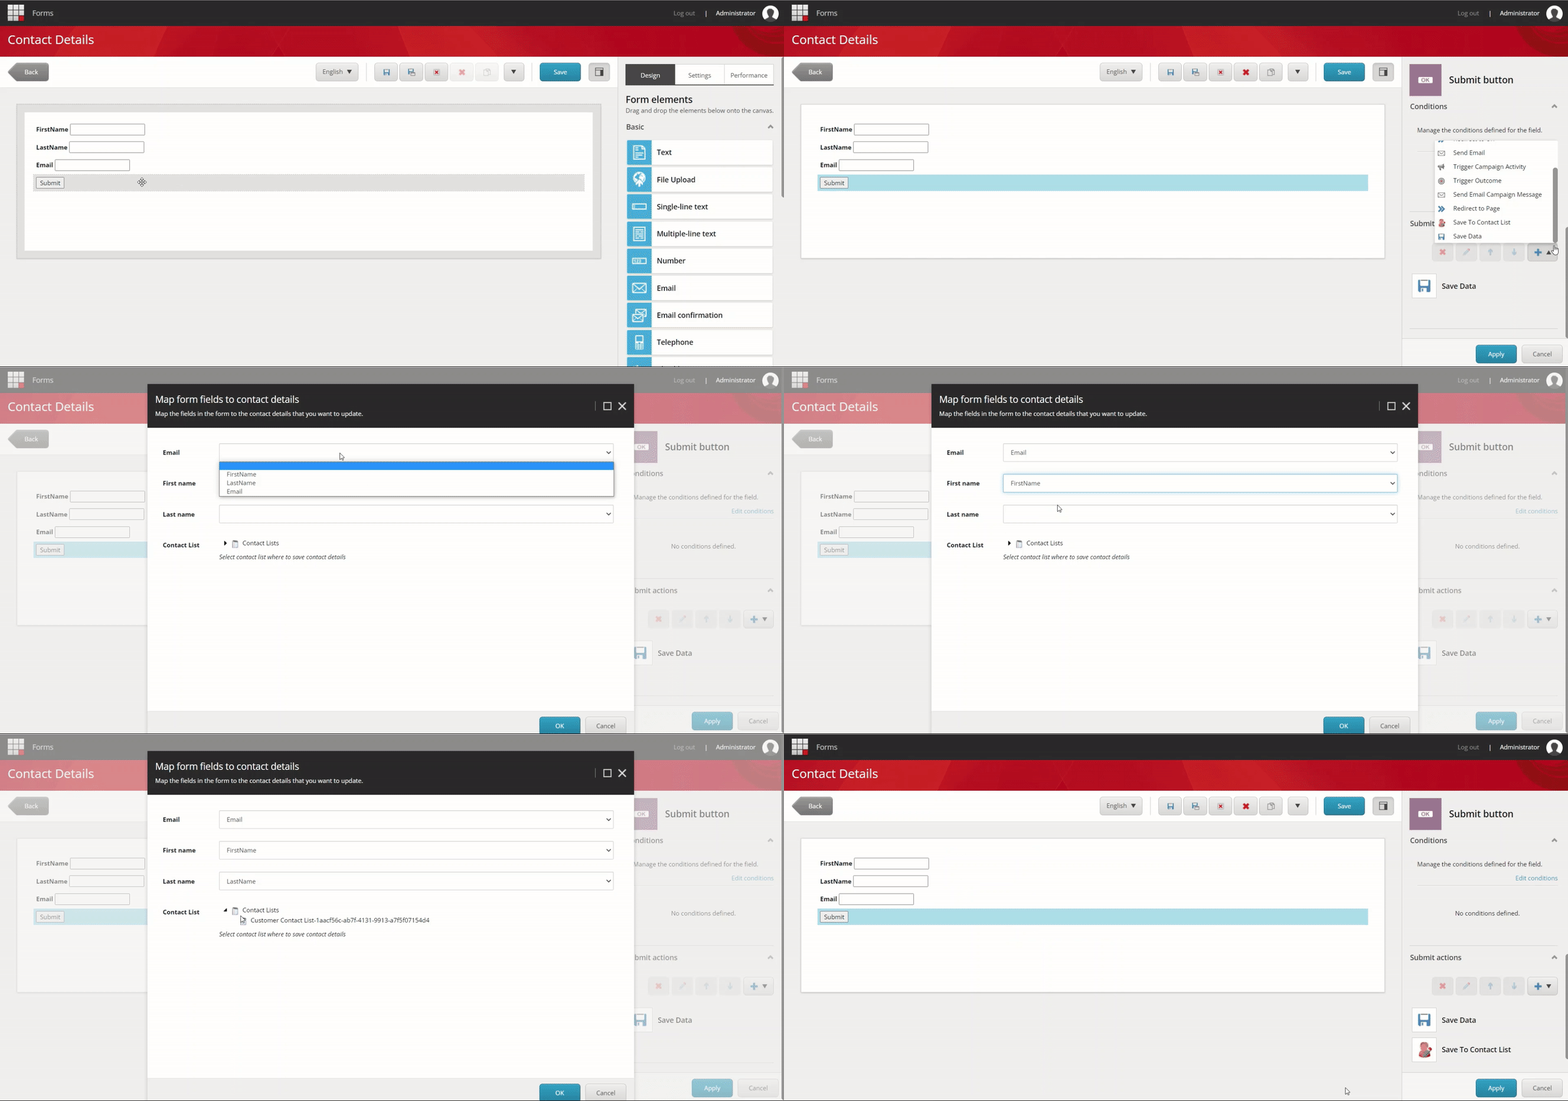
In this article, we will create a submit action that should have the ability to map Form fields to Contact fields. That allows us to assign the first name, last name, and email to any of the form's fields. Additionally, provide users with a tree view list to select the Contact List where they want to store the contact information.
Submit Action to Save Contacts in List Manager with Fields Mapping
We will start by creating the editor layout (SPEAK) for the submit action from scratch. The next part will cover the steps to creating the submit action item and its code.
Form Submit Action - Save To Contact List - With Field Mapping
The Sitecore official documentation includes a walkthrough for constructing a submit action with field mapping. In this implementation, we will introduce an additional option to allow users to choose the Contact List in the Submit action where the contacts will get stored.
Create SPEAK Editor Layout for Submit Action
To create the SPEAK editor from scratch, you need the Sitecore Rocks Visual Studio plugin installed. Open Visual Studio and connect it to your Sitecore instance.
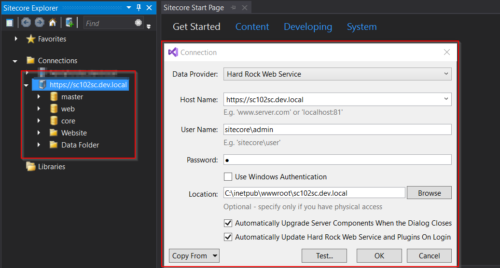
Sitecore Rocks Connection
1. Item Creation and Layout Configuration
-
Go to core database: /sitecore/client/Applications/FormsBuilder/Components/Layouts/Actions.
-
Right-click on the Actions item, and Add a New Item.
-
Search for the Speak-BasePage template (/sitecore/client/Speak/Templates/Pages/Speak-BasePage). Give the item name as SaveToContactList in the “Enter the name of the new item” textbox at the bottom and click OK.
-
Right-click the newly formed SaveToContactList item and select Tasks, then Design Layout.
-
Click browse on the Layout field, and search for Speak-FlexLayout (/sitecore/client/Speak/Layouts/Layouts). Click OK after selecting it.
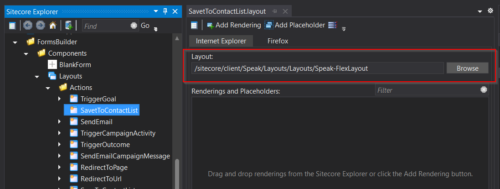
Item Creation And Layout Configuration
2. Adding Renderings
-
Click on the Add Rendering button in the top-left corner.
-
In the Select Renderings window, search for PageCode (If you do not see the result, make sure you have selected 'All' in the left pane).
-
Select PageCode under /sitecore/client/Speak/Layout/Renderings/Common and click OK.
-
Select the PageCode rendering. Go to the properties window and update the following values.
PageCodeScriptFileName: /sitecore/shell/client/Applications/FormsBuilder/Layouts/Actions/SaveToContactList.js (This will be the JavaScript path that contains the page code script, we will add this JS file in later steps)
- SpeakCoreVersion: SPEAK 2-x
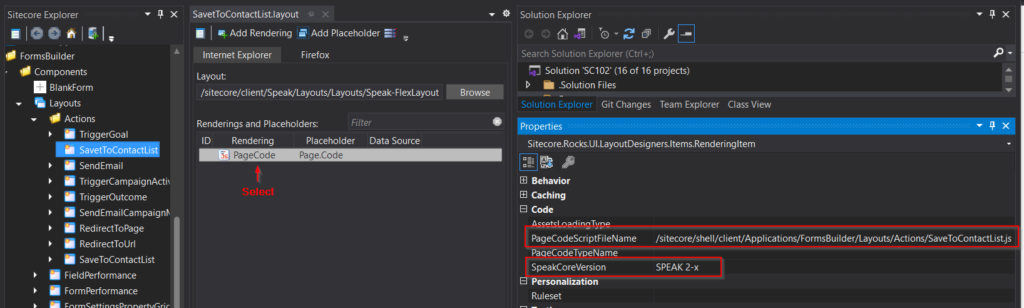
Page Code - Properties Window
-
Add renderings for HeaderTitle, HeaderSubtitle, and ValueNotInListText. Search for Text and then select the "/sitecore/client/Business Component Library/version 2/Layouts/Renderings/Common/Text" view rendering.
-
For HeaderTitle, select the added Text rendering and go to the properties window and set the following fields:
Id - HeaderTitle
-
IsVisible - False
-
PlaceholderKey - Page.Body
-
Repeat the same step for HeaderSubtitle, and ValueNotInListText. Only the Id property will change as per the name. IsVisible and PlaceholderKey will be the same as above.
-
Add Border view rendering (/sitecore/client/Business Component Library/version 2/Layouts/Renderings/Containers/Border) and set its Id property as MainBorder.
-
Add Form view rendering (/sitecore/client/Business Component Library/version 2/Layouts/Renderings/Forms/Form) and set its Id property as MapContactForm, select FieldsLayout property as 1-1-1-1 and set the PlaceholderKey property to MainBorder.Content.
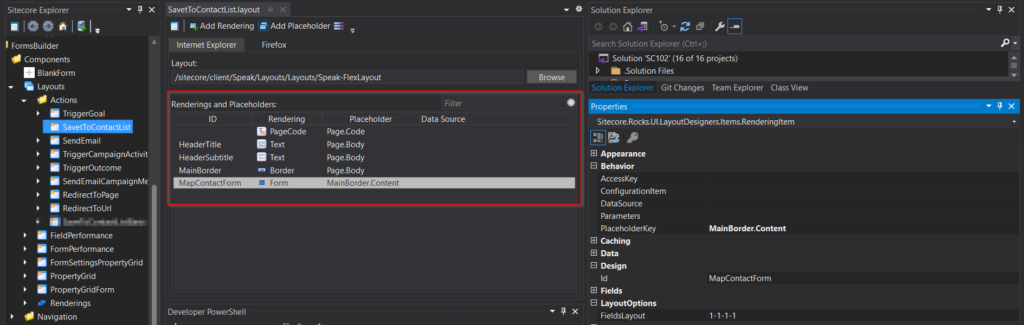
Rendering And Placeholders
3. Adding Page and Form Parameters
-
Select the SaveToContactList item (/sitecore/client/Applications/FormsBuilder/Components/Layouts/Actions/SaveToContactList). Right-click > Add > New Item.
-
Search for the PageSettings template (/sitecore/client/Speak/Templates/Pages/PageSettings). Select and enter the name PageSettings and then click OK.
-
Right-click on the newly created PageSettings item.
-
Add new items with name HeaderTitle, HeaderSubtitle and ValueNotInListText using the Text Parameters template (/sitecore/client/Business Component Library/version 2/Layouts/Renderings/Common/Text/Text Parameters)
HeaderTitle – double-click on the item and update the Text field as the title of the editor popup. For example, Map form fields
-
HeaderSubtitle – double-click on the item and update the Text field as the subtitle title of the editor popup.
-
ValueNotInListText – double-click on the item and update the Text field. For example, the value is not in the select list.
-
Select the PageSettings item again. Right-click > New Folder and add a folder with the name MapContactForm.
-
Select the MapContactForm folder. Add three new items with the FormDropList Parameters templates with the following field values (/sitecore/client/Business Component Library/version 2/Layouts/Renderings/Forms/Form/Templates/FormDropList Parameters).

FormDropList Parameters
- Click on the MapContactForm folder and add an item name ContactList with FormItemTreeView Parameters templates (/sitecore/client/Business Component Library/version 2/Layouts/Renderings/Forms/Form/Templates/FormItemTreeView Parameters). Update the field values as below:
StaticData - {3C94F086-453B-48FC-9F1B-2B00BC0A55C7}
-
Database - master
-
HelpText - 'Select the contact list to save contact details'.
-
FormLabel - "Contact List"
-
BindingConfiguration - contactListId/SelectedItemId

ContactList - Parameter
Note: For the StaticData field in the ContactList parameter item, update the GUID of the Contact List folder.
-
Move the ContactList item below the LastName item (drag the ContactList item down or update the sort order value).
-
Select the PageSettings item.
-
Add a new item named Stylesheet using the template Page-Stylesheet-File (/sitecore/client/Speak/Templates/Pages/Page-Stylesheet-File)
-
Double-click on the new stylesheet item. Assign the value "/sitecore/shell/client/Applications/FormsBuilder/Layouts/Actions/Actions.css" to the Stylesheet field.
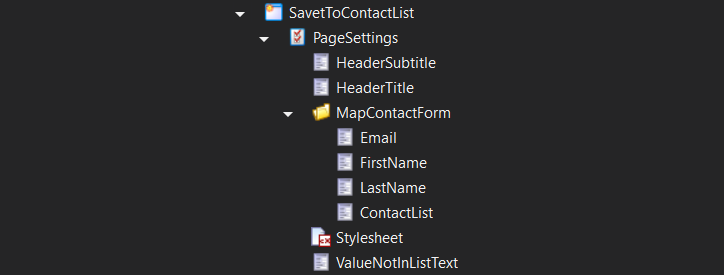
Page Settings and Form Parameters
4. Updating the Form Parameter Folder ID in the Layout
-
Select the SaveToContactList item and right-click > Task > Design layout.
-
Select the added Form rendering.
-
In the properties window, set the ConfigurationItem property to the ID of the MapContactForm folder.
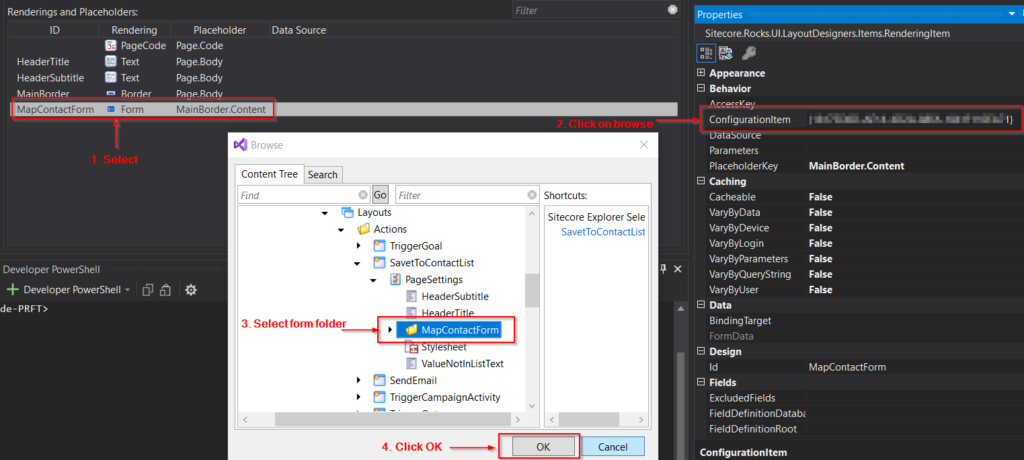
Update Form Parameter Folder Id In Layout
5. Adding the SaveToContactList.js File
The client script for the editor with field mapping is available here. We can't use this directly, as it is focused only on the FormDropList field in the MapContactForm. But we also have a FormItemTreeView (for the contact list). If we continue with the same script, it will cause a problem with the setDynamicData method.
To fix the issue, we can add an if check in the setDynamicData function, as shown below:
setDynamicData: function (propKey) {
                    if (this.MapContactForm.bindingConfigObject[propKey].split(".")[1] === "SelectedValue") { //To allow only FormDropList field
                        //logic to set Dynamic Data for FormDropList field
                    }
                }
Here is the final client script for the editor after making this modification. Add this SaveToContactList.js file in your feature project as location /sitecore/shell/client/Applications/FormsBuilder/Layouts/Actions/SaveToContactList.js
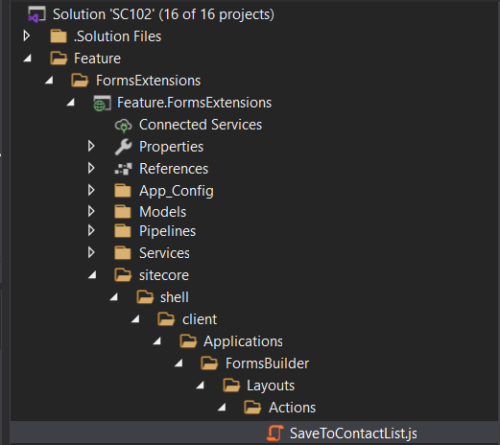
SaveToContactList Javascript In Project
Our SPEAK editor layout for the SaveToContactList custom Submit Action is now ready. The Sitecore package for the above editor item we created is available at Core-SaveToContactList-SPEAK-Editor. To access the entire solution, please visit the GitHub repository.
In the next post of this tutorial, we will go through the final steps for creating a submit action item and associated code.